How to Create Msi Package in Visual Studio 2017
How to create a Windows Installer/ Setup File for Desktop Application using Visual Studio 2017.
Hi all, this is a brief explanation on how to create a windows installer/ setup file for a desktop application. I used to try this with WPF application, but you can try this for any kind of desktop applications.
Lets' start with the basics..,
The main idea is to give you a brief introduction on building a installer/setup file using Visual Studio. To create a installer I just want you to create a simple application.
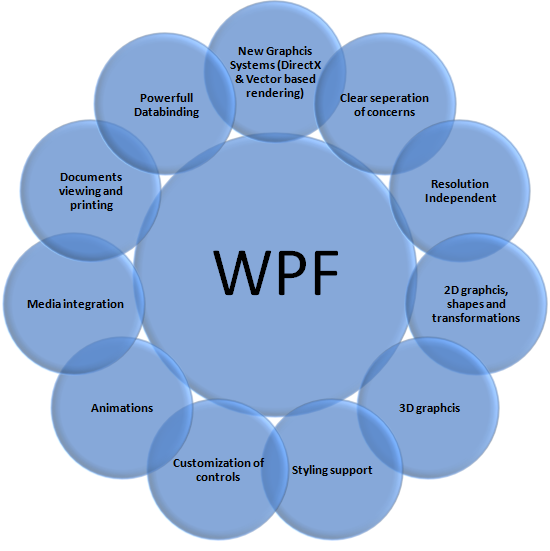
First we look how to crea t e a sample WPF application using Visual Studio. This is a small program to change the button background color when you press the button. Lets' go forward step by step (Please consider that I just go-through the main steps to create this sample app, there are many features you can try with WPF application development).
Procedure to create Sample WPF project :
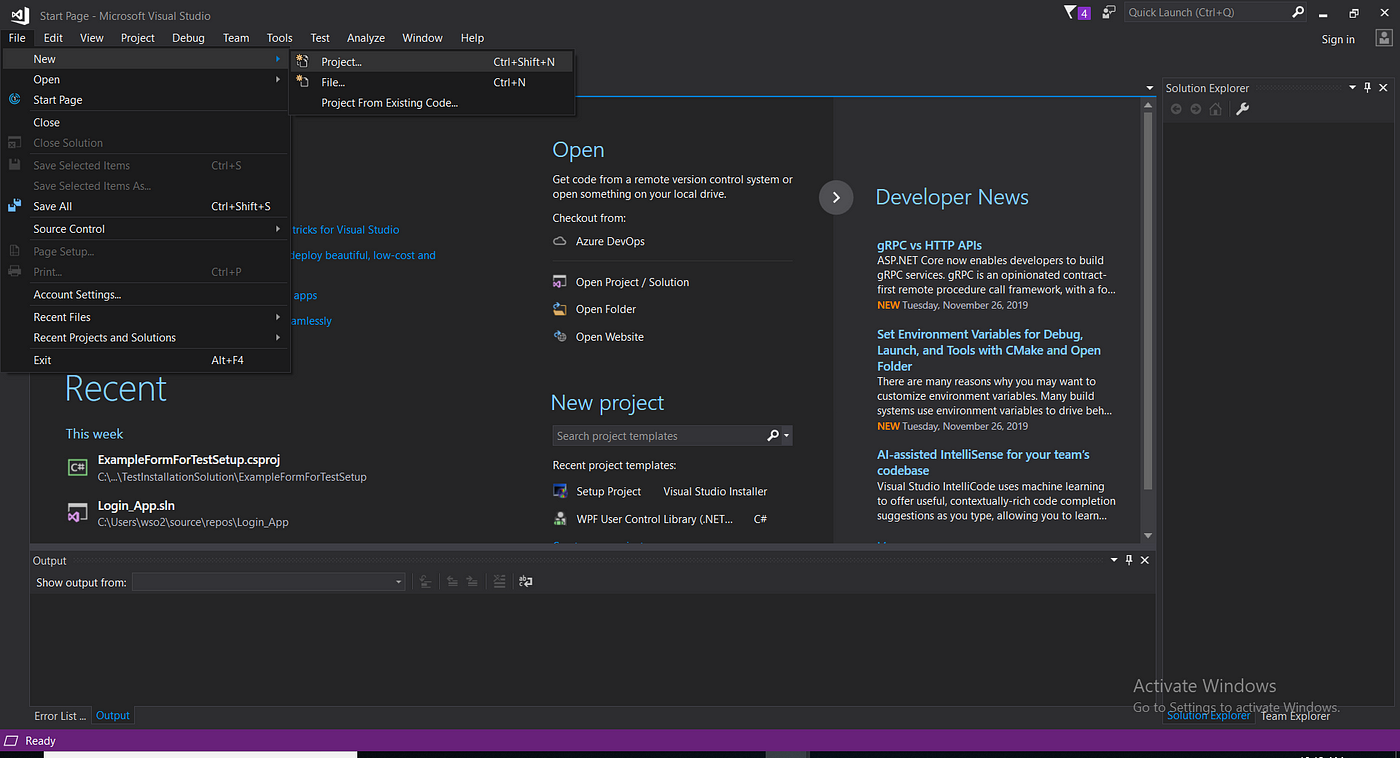
Step 01 : Open Visual Studio 2019. On the start window, choose Create new project.
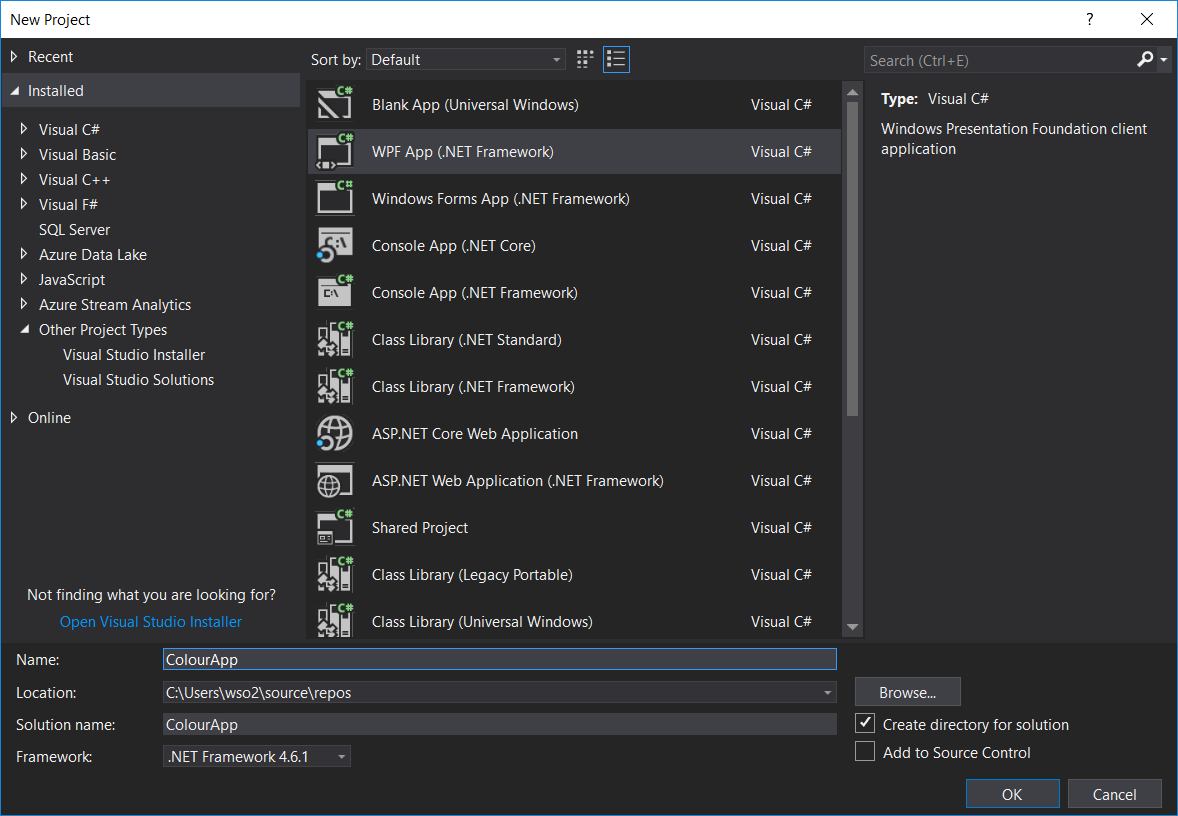
Step 02 : Select a project type as your preference( I used to choose WPF App (.NET Framework), for this project), rename the project and click "OK".
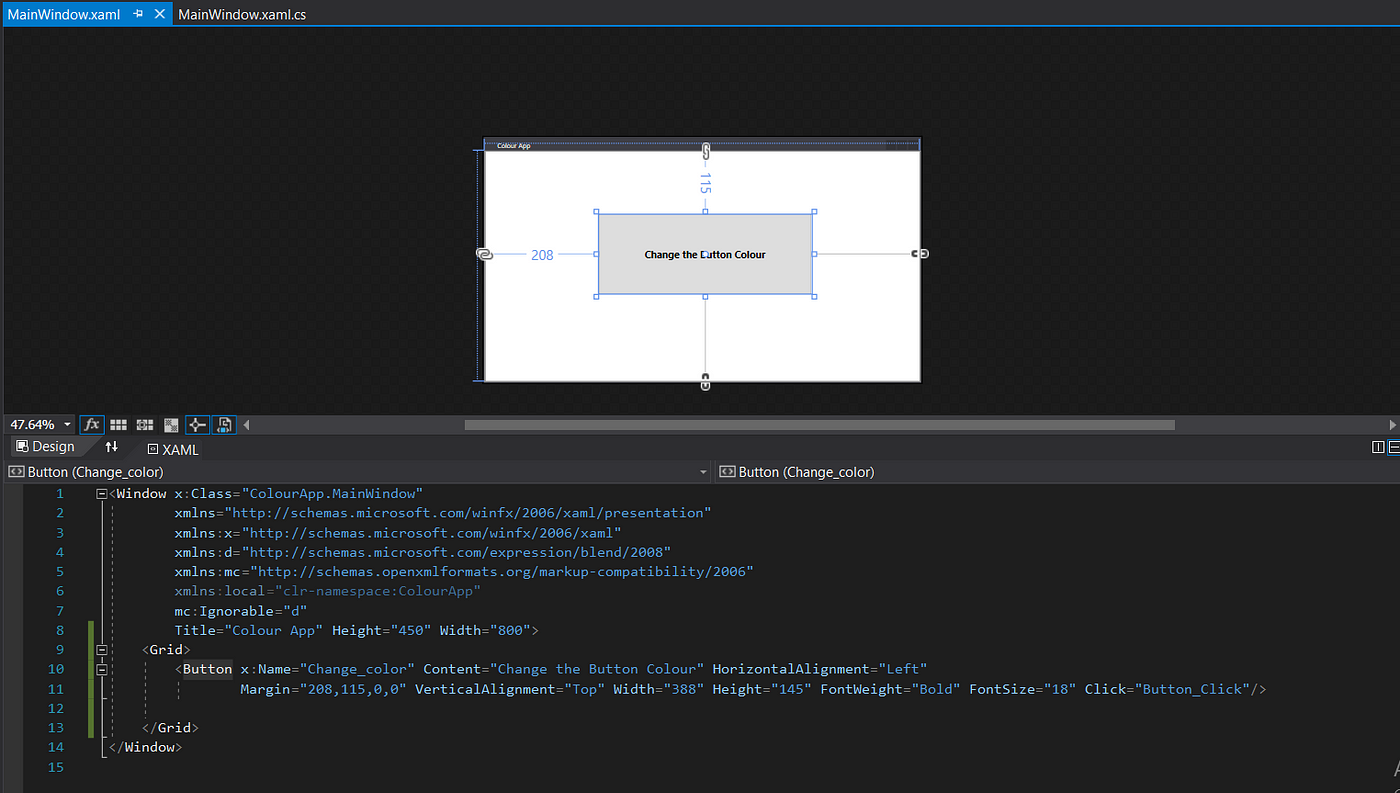
Visual Studio creates the ColourApp project and solution, and Solution Explorer shows the various files. The WPF Designer shows a design view and a XAML view of MainWindow.xaml in a split view. You can slide the splitter to show more or less of either view. You can choose to see only the visual view or only the XAML view.
Step 03 : The XAML view and the visual view of the application as follows. I just created a button to change the colour of the button. You can try with many functions and develop your own application.
          <Window x:Class="ColourApp.MainWindow"
xmlns="http://schemas.microsoft.com/winfx/2006/xaml/presentation"
xmlns:x="http://schemas.microsoft.com/winfx/2006/xaml"
xmlns:d="http://schemas.microsoft.com/expression/blend/2008"
xmlns:mc="http://schemas.openxmlformats.org/markupcompatibility/200"xmlns:local="clr-namespace:ColourApp"
mc:Ignorable="d"
Title="Colour App" Height="450" Width="800">          <Grid>
<Button x:Name="Change_color" Content="Change the Button Colour" HorizontalAlignment="Left" Margin="208,115,0,0" VerticalAlignment="Top" Width="388" Height="145" FontWeight="Bold" FontSize="18" Click="Button_Click"/>
</Grid>          </Window>
Step 04 : The C# code for above XAML application as below.
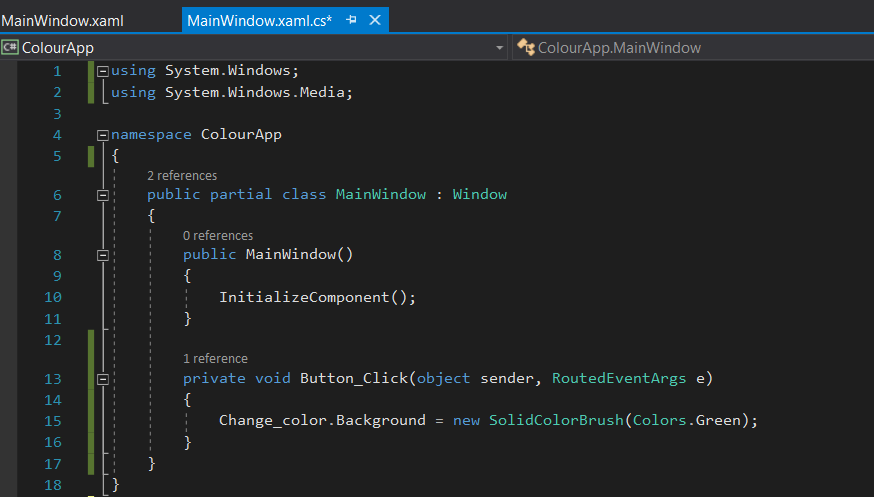
          using System.Windows;
using System.Windows.Media;          namespace ColourApp
{
            public partial class MainWindow : Window
            {
            public MainWindow()
            {
            InitializeComponent();
            }                      private void Button_Click(object sender, RoutedEventArgs e)
            {
            Change_color.Background = new SolidColorBrush(Colors.Green);
            }
            }
}
Step 05 : After try above steps save the project and build/run the project using Build → Build solution. You can change the button colour to green by one button press as follows. Try to implement your own application ideas with WPF .
Congratulations on completing this steps! You can find the .exe you built under your solution and project directory (\ColourApp\ColourApp\bin\Release) or in (\ColourApp\ColourApp\bin\Debug).
Try below steps to create a Installer/Setup file for your application.
Procedure to create Setup file:
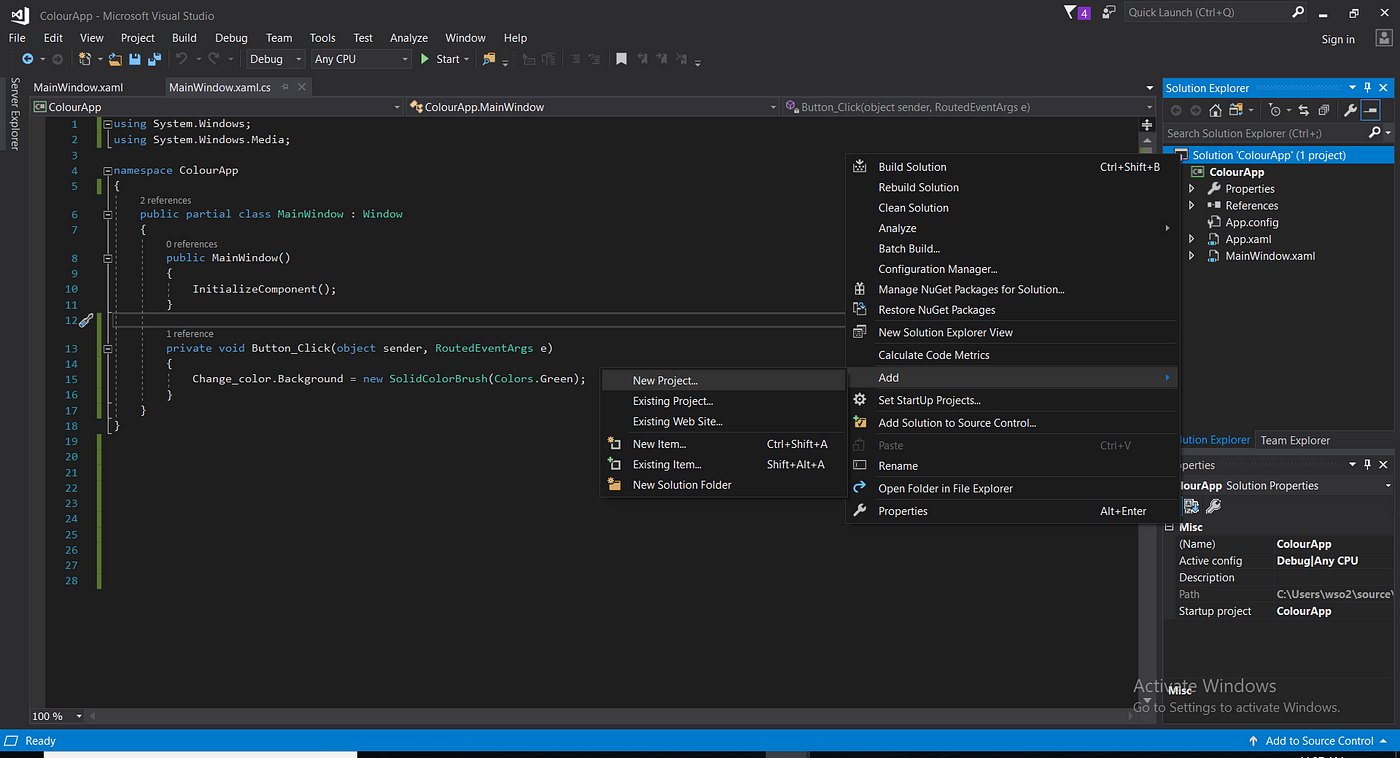
Step 01 : Right click on solution and in context menu click Add, then New Project.
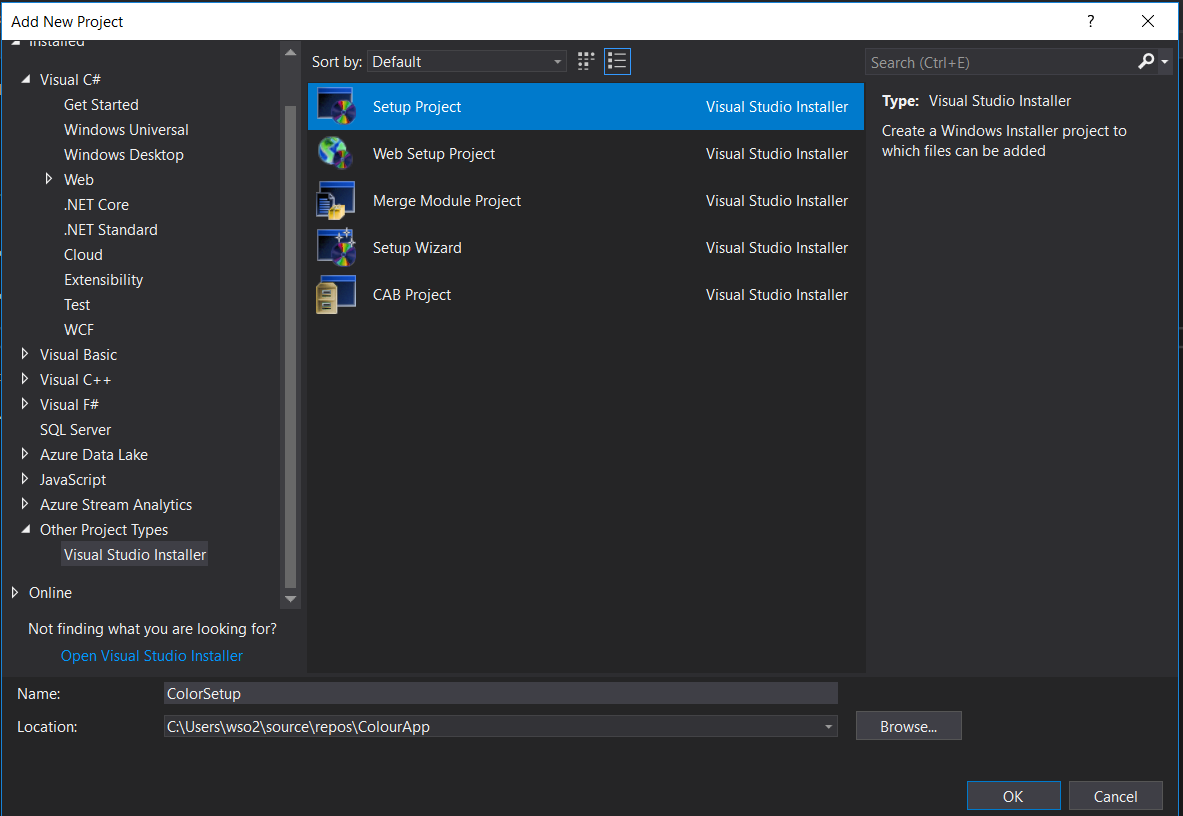
Step 02 : After that you can see a new project window, in that right side you can select Other Project Types in installed Templates, then select as shown below.
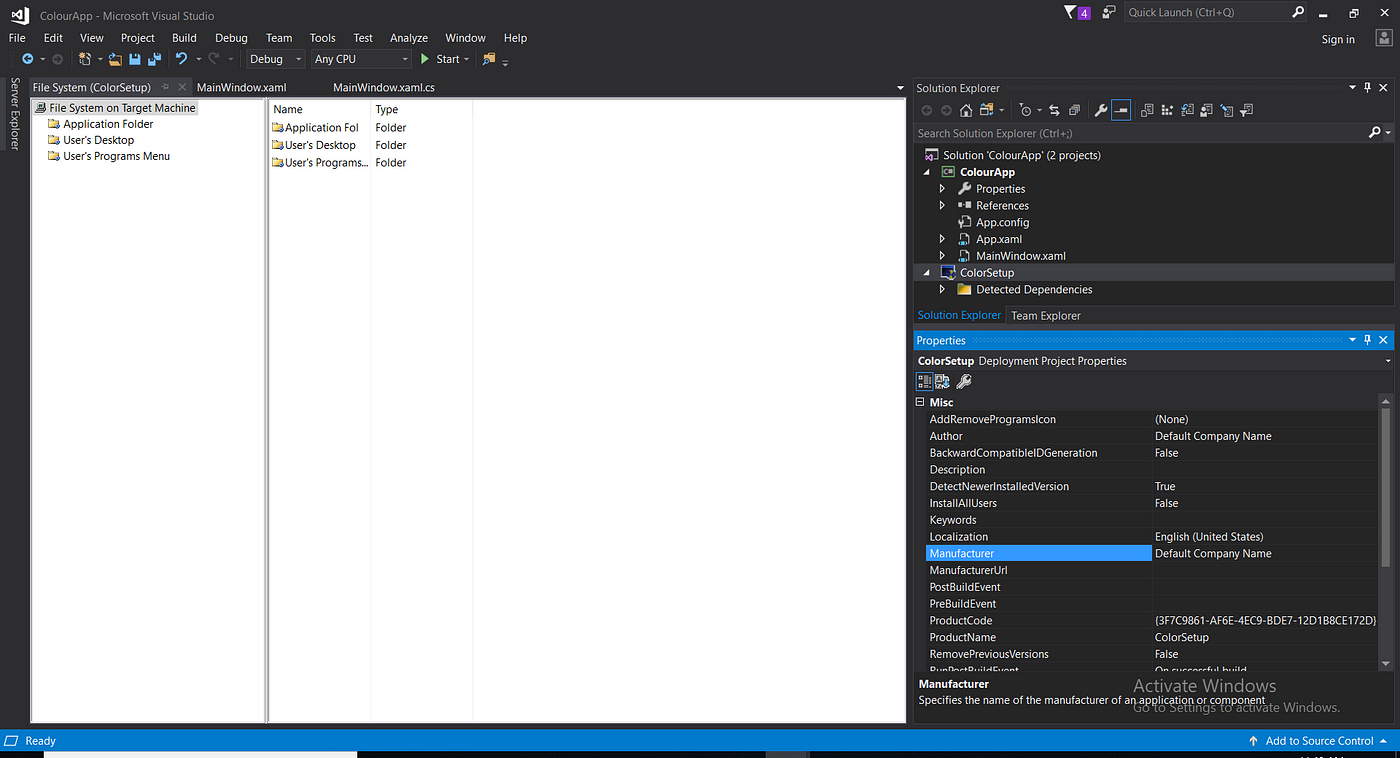
Step 03 : Now you can see one project in the same solution as ColorSetup(project name). You can see the properties for this project and can change these properties as you wish like Author, Manufacture, etc. as in the following figure.
Then I am going to show you how you can import your project files to setup file, for that right click on this ColorSetup project and in context menu select Add, then click Project Output.
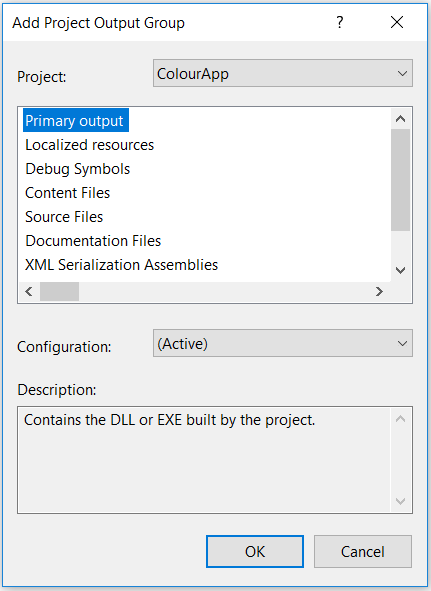
Step 04 : After that you can see a pop up as below, from this pop up select required items, mainly Primary output, then click OK.
After adding the items as in above figure you will get the screen as below,
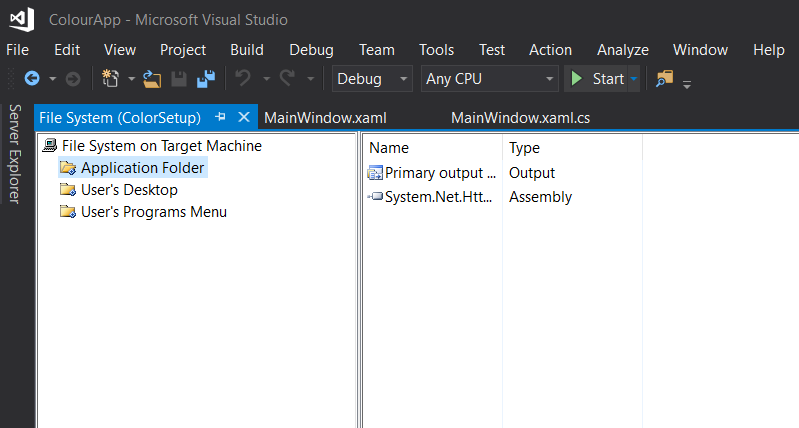
Here you can see there are three folders on the left side tab called File System,
- Application Folder : This is your Destination folder where you're going to install or copy the entire application, so here you can add all your project files.
- User's Desktop : This folder is your desktop, here you can put shortcut of application file.
- User's Programs Menu : This folder is your start menu context folder, here also you can put shortcut of application file, help file or any documents, etc.
Here on right side under ColorSetup project tree and in inside application folder you can see item name starts with Primary output from <ProjName>, it is the output of your project i.e., it is going to be your main .exe file. And you can also see all your external .dll files required for your project to run.
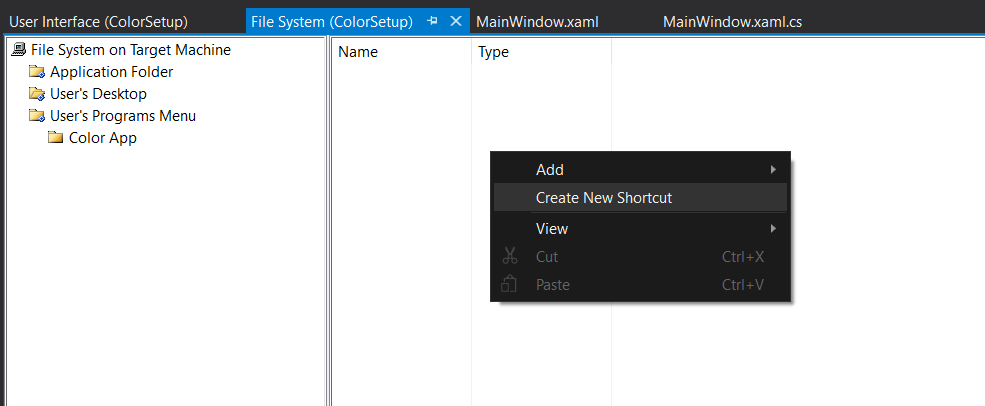
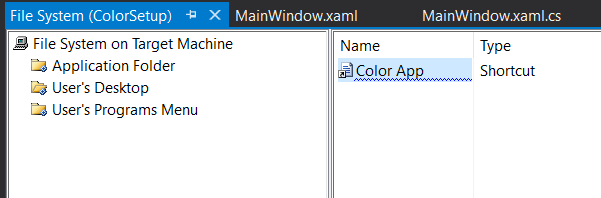
Step 05 : Next we can add shortcut of application file to User's Desktop, for this select User's Desktop folder . On the right side you can see blank space having heading Name and Type. In that you can right click and then in context menu select Create New Shortcut as shown below.
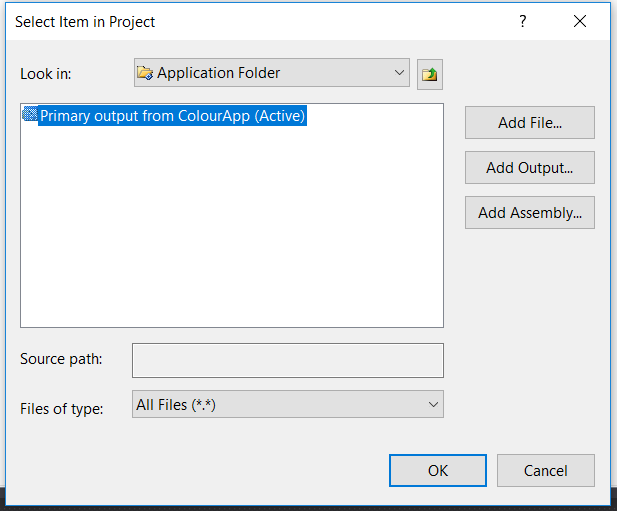
Then you will get one pop up box like below, in that select Primary output From <ProjName>, then click OK.
Now you can see one shortcut file added on that blank space, here you can change the name of shortcut :
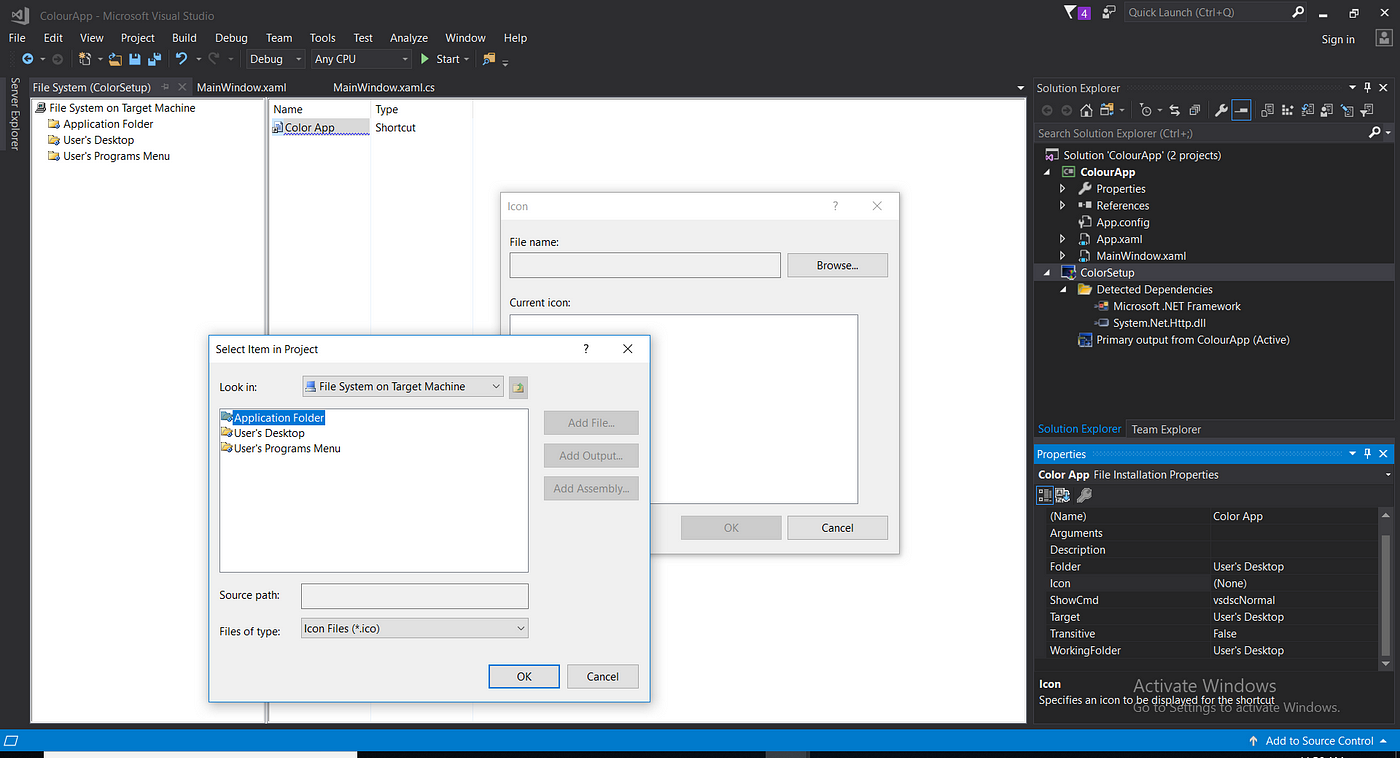
You also can give icon for this shortcut as in the following figure:
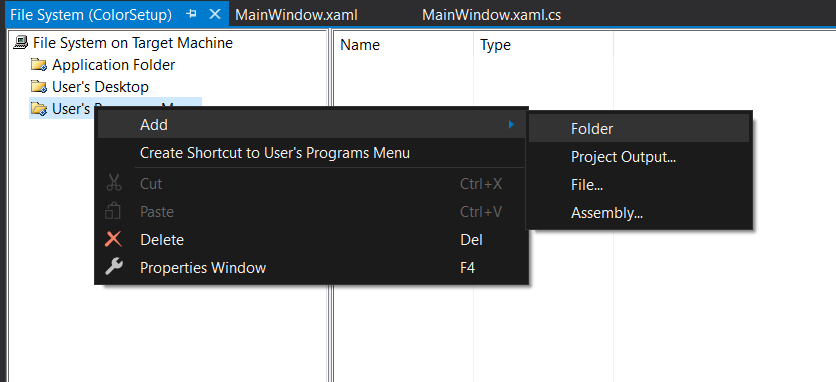
Step 06 : Next you can add shortcut file to the User's Program Menu folder as I did in User's Desktop folder and if you want you can add some document as well in this folder. This folder will come under your Start menu →All programs folder, so if you want more files to be added then first add one folder into this User's Programs Menu folder as shown below, then add whatever files you want.
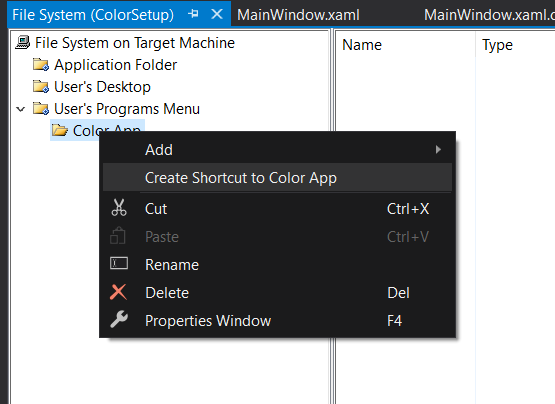
Step 07 : We can add shortcut of application file to User's Programs Menu → Color App folder, for this select Color App folder(folder you created before) and follow the Step 05 to create the shortcut.
Now you can design your setup.exe file as in the following figure: (View →Editor →User Interface)
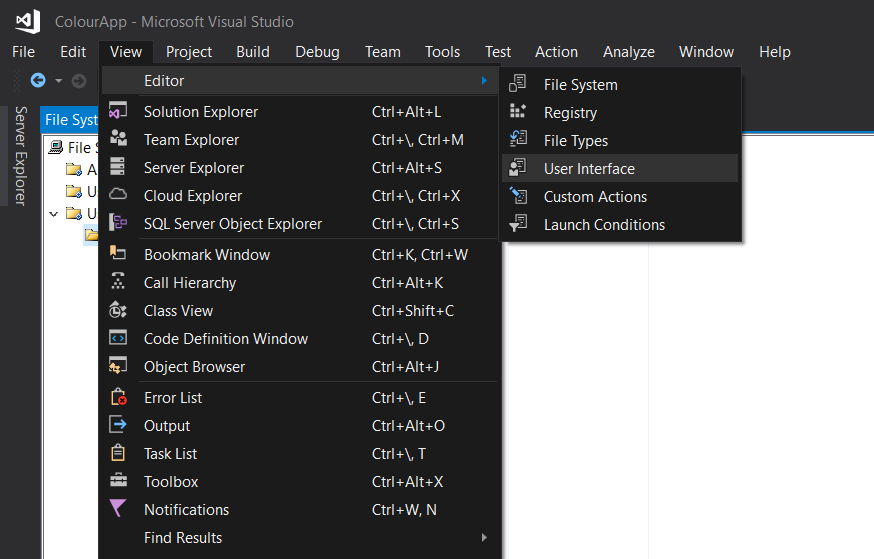
After adding the User Interface as in above figure you will get the screen as below.
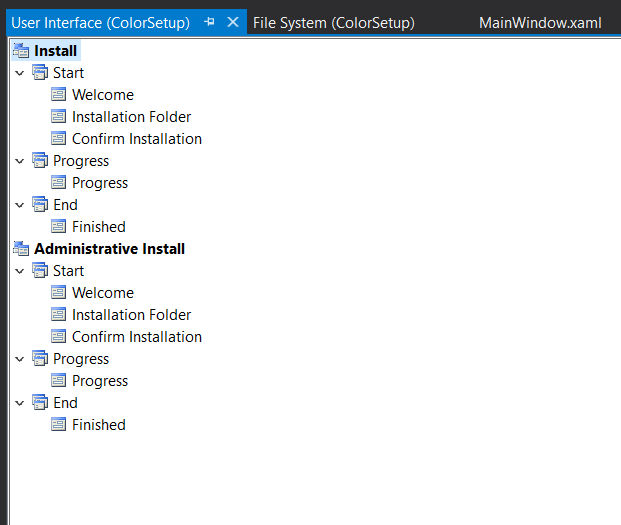
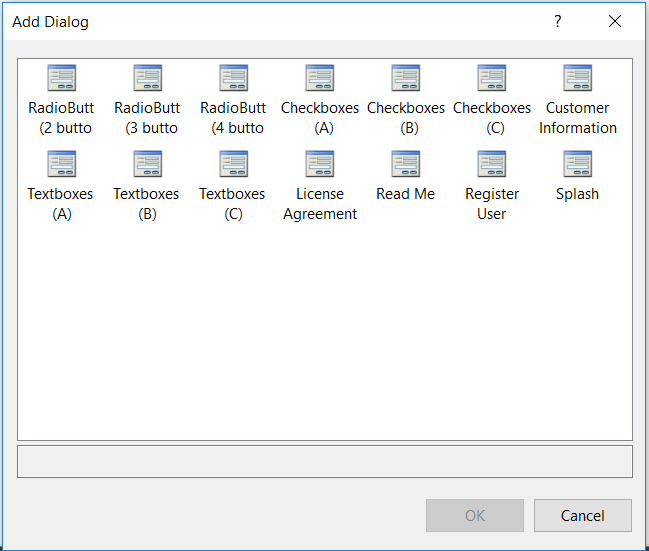
You can give banner image and can change Copyright Warning message, welcome text, etc. by Right click on Start/Progress/End and in menu click Add Dialog.
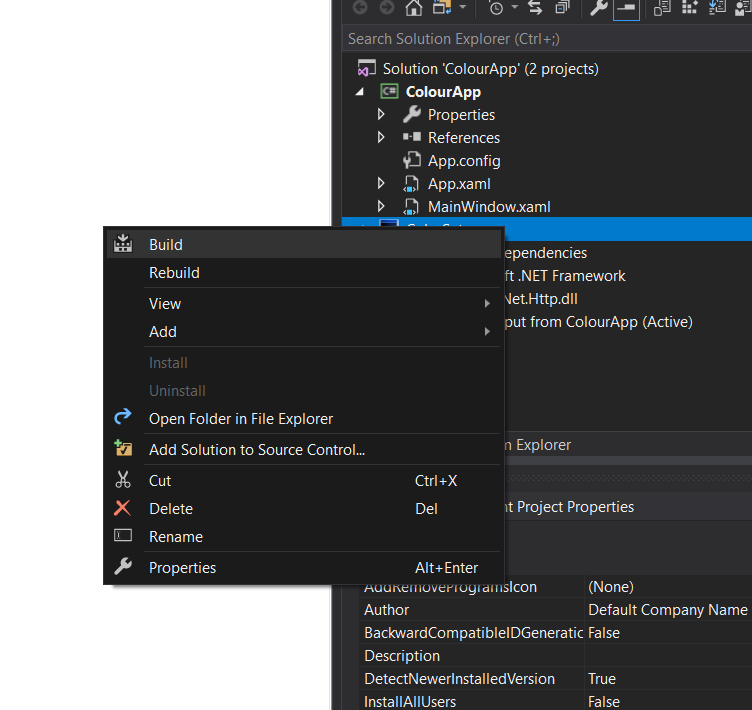
Now the time to build setup file, for this right click on ColorSetup in Solution Explorer and select Build, That's it.
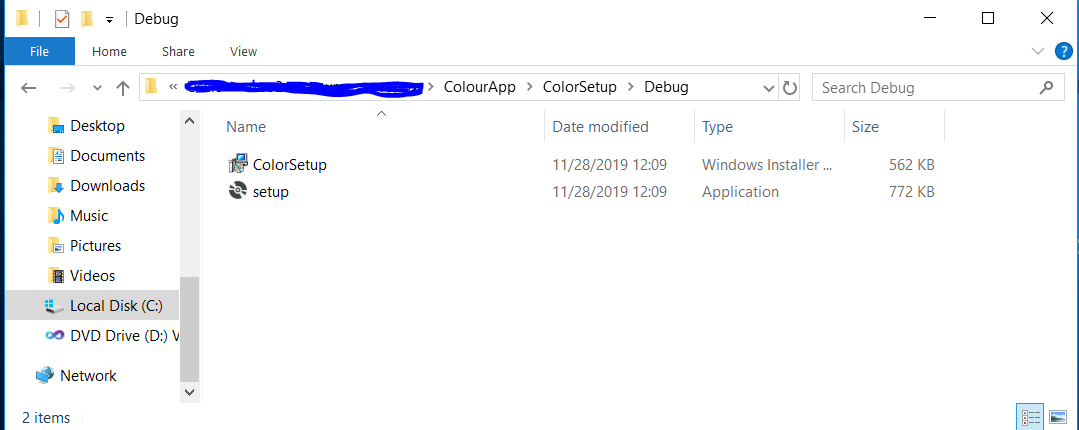
After build success you can see in your project folder one extra folder created. Inside Debug folder you can see your setup file as shown below.
Then run the setup file to install the installer to your machine. You can see the initial steps within the installation process as shown below.
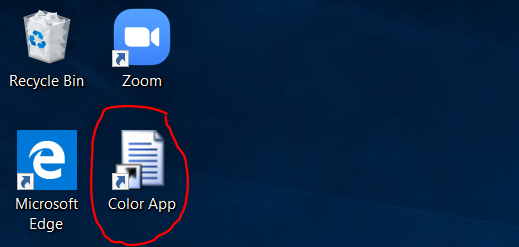
Now you can see the shortcut of the app that you already created, on your desktop.
You can run the application without any IDE now.
Congratulations on completing this guide!
I assume that you'll get a basic idea about "How to create a Windows Installer/ Setup File for Desktop Application using Visual Studio 2017". For this blog i used WPF sample. It's much appreciated if you can try out another sample of native application by the use of this guide.
Cool ! We almost finished with this application. If you wish to express anything about this, your valuable comments are warmly welcome.!
How to Create Msi Package in Visual Studio 2017
Source: https://medium.com/@kanchanaj/how-to-create-a-windows-installer-setup-file-for-desktop-application-using-visual-studio-2017-beb13015fb58